

What every other post about Redux on the internet says: 😶
"Don't use Redux, it has too much boilerplate".
"Oh, man! I have to do so many npm installs"
"You have to write so much code, just to configure it!"
Never heard of Redux or super new to it? I gotch you
This is one of the best explanations of Redux. Here ya go!
Why use Redux Toolkit? 🤷♂️
Redux toolkit includes all the functions or "tools", you want for a Redux application. At the end of the day, less code and faster setups of Redux in every scenario.
Here's what the Official docs said :
These tools should be beneficial to all Redux users. Whether you're a brand new Redux user setting up your first project, or an experienced user who wants to simplify an existing application, Redux Toolkit can help you make your Redux code better.
Setup create-react-app with Redux 🔨
Create-react-app gives you a basic React app so don't have to setup React yourself. Install it globally, if haven't already.
Do this on your terminal :
npx install -g create-react-app
Then to create your React app and cd into the root directory of your React app
create-react-app react-redux
cd react-redux
Then we will install redux
npm install --save react-redux @reduxjs/toolkit
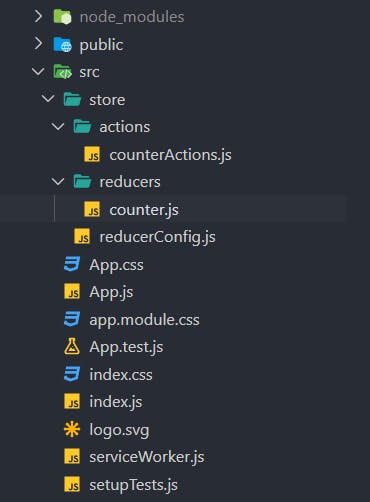
We will be following this folder structure
 Now we have to configure our Store, now this is where you'll the magic redux toolkit! Now create a folder called
 store and under that a file called reducerConfig.js containing
import { configureStore } from "@reduxjs/toolkit";
import { combineReducers } from "redux";
const reducer = combineReducers({
    // we will return here, you have to include all your Reducers here!
});
const store = configureStore({
    reducer,
});
export default store;
Here configureStore({}) wraps createStore() to simplify the configuration for us. You can add whatever Redux middleware you want to supply and it already includes redux-thunk and has already enabled Redux DevTools Extension (install this!).
People who have used Redux before could already see how much work is handled by Redux Toolkit.
Now we need to connect our store to our app or just wrap it with
Redux. Import reduxConfig.js and Provider from react-redux into src/index.js
....
....
import store from "./store/reducerConfig";
import { Provider } from "react-redux";

ReactDOM.render(
    <React.StrictMode>
        <Provider store={store}>
            <App />
        </Provider>
    </React.StrictMode>,
    document.getElementById("root")
);
Now start your application with npm start and open up Redux DevTools, you should see @@INIT. Congrats you have setup Redux with React!! 🥳️
How to use Redux in your project? 🤔
Just to understand the workflow we will build a simple counter app.
Make a folder under our store called "actions" and then make a file called counterActions.js,
store/actions/counterActions.js :
// This is a Action Type, you can move this to  another file and export it
// from there -- its called "best practice" :)
export const ADD = "ADD";
// This is the "Action" it self which indicates which reducer which will be called
export const inc = () => {
    return {
        type: ADD,
    };
};
Now we are going to create Reducers. This is where we will initialize our state and make changes to it. If the concept of actions and reducers are not making sense right now, it will in a second. Now we create a folder called "reducers" and then create a file inside it called "counter.js".
src/store/reducers/counter.js
import { ADD } from "../Actions/counterActions";

const initState = { // this is your initial state.
    counter: 0, // variable inside your state, too keep track of the count.
};
// assigning initial state and receiving actions as arguments.
const reducer = (state = initState, actions) => {
    switch (actions.type) {
        case ADD:
            return {
                ...state, // here you copy the state and make changes to it.
                counter: state.counter + 1,
            };
        default:
            return state;  // Have to return state as a default
    }
};
export default reducer;
Here a specific part of the state is updated according to the action dispatched by our frontend. Here is what Freecodecamp had to say:
The only way to update a state inside a store is to dispatch an action and define a reducer function to perform tasks based on the given actions. Once dispatched, the action goes inside the reducer functions which performs the tasks and return the updated state to the store. This is what Redux is all about.
Now in our reduxConfig.js file add our reducer that we just created
.
.
import counter from "./reducers/counter";
const reducer = combineReducers({
    counter, // put all your reducers here!
});
.
.
Handling Redux in our React code ⚛
In your src/App.js file paste the following React code :
import React from "react";
import { useDispatch, useSelector } from "react-redux";
import { add } from "./store/Actions/counterActions";
function App() {
    const dispatch = useDispatch();
    const { counter } = useSelector((state) => state.counter);
    return (
        <div style={{ textAlign: "center" }}>
            <div>
                <p style={{ margin: "1rem" }}>{counter}</p>
                <button onClick={() => dispatch(add())}> Add +1 </button>
            </div>
        </div>
    );
}
export default App;
Here useDispatch() is provided by "react-redux" and used to dispatch our actions.
const dispatch = useDispatch();
Remember the name of our reducer we imported in reducerConfig.js, that's the name we have to use when using the useSelector() hook. It receives our state in arguments and then we can extract every other variable in our state with the help of destructuring :
const { counter } = useSelector((state) => state.counter);
Now in your Terminal, to start your React app:
npm start
Now your app should look like this :
Congrats you made it! 🥳️
You have setup react and Redux! There are obviously many complex use cases of Redux which I will cover in the upcoming blogs.
Inspiring lyrics from Hip-hop (You'll find these in every one of my blogs)

-Logic, Under Pressure